![]() ‘Synchronize’
feature in
‘Synchronize’
feature in ![]()
How to Synchronize:
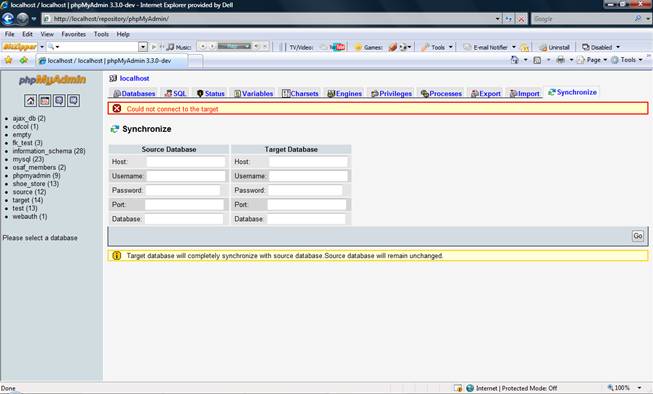
The synchronize tab is visible upfront in the right pane, the last link on the top of the home page.
Press on the Synchronize tab and a form will be displayed.
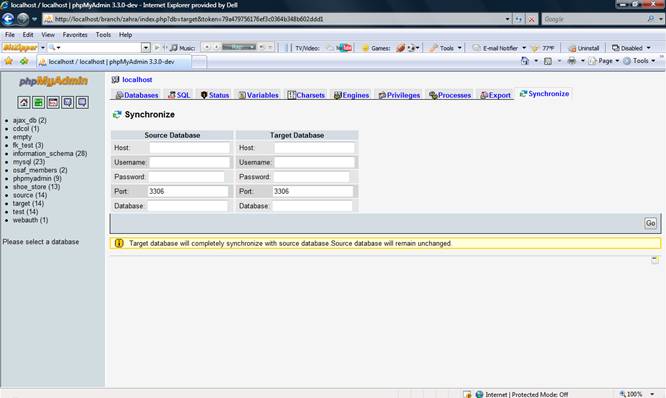
Db Authentication Form?
You need to fill in the host name of the server, the username and password of an user account already there in MySQL. Port is by default populated with 3306 (MySQL default port). Then the name of the database should be mentioned at the end.All the information other than the port needs to be filled explicitly for the source as well as target servers.
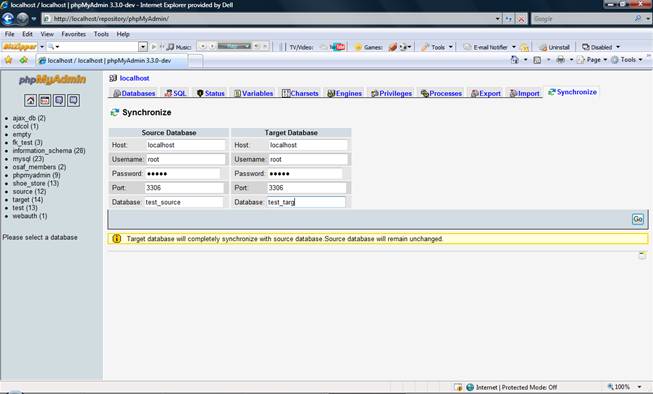
A filled form is displayed underneath:
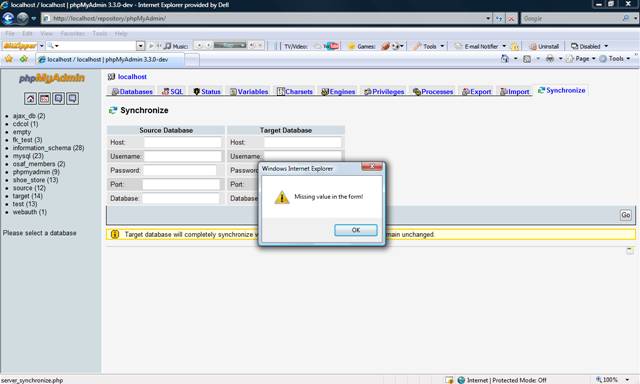
Invalid entries during DB Authentication:
The user will not be allowed to by pass this page if any of the values like Host name, Username and Database name remain unfilled and the user presses ‘Go’ button. An alert would occur as follows, not allowing the user to move to the next page. On the other hand, the password field can remain empty.
If any wrong information is provided by the user like wrong password, username or hostname then the connection is not established with the corresponding database and an error message is seen as follows.
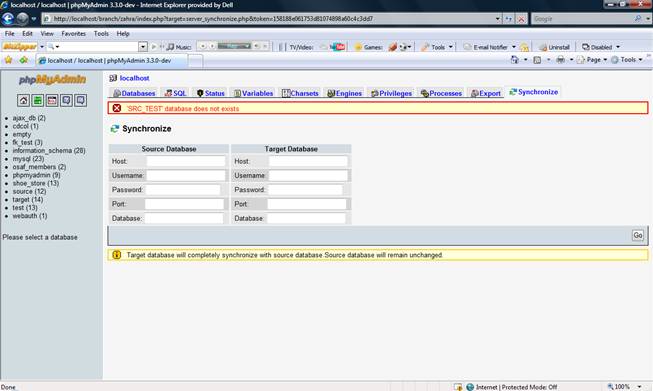
If the user enters a database name that does not exist, then even an error message occurs as follows and the user needs to re-enter all the information.
After passing DB Authentication:
After successfully by passing authentication phase, the source and target database table names will be displayed. It will be a tabular representation like this.
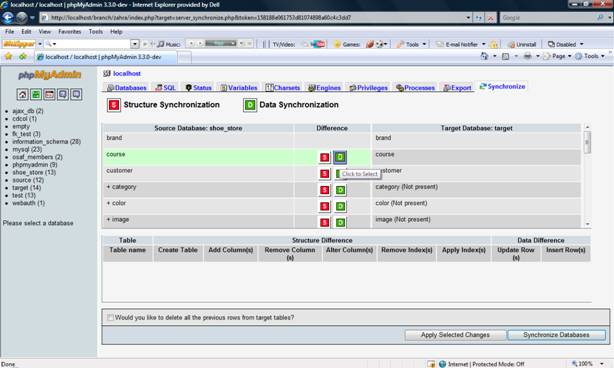
Left Column:”Source Database”
On the left, are listed the source database table names. Some of the names have a ‘+’ plus sign preceding them. This shows that these tables are only present in source database and they need to be added to the target database in order to synchronize the target database.While those table name that are not preceded by a ‘+’ sign are also present in target database.
Middle Column:”Difference”
The column in the middle shows the difference between the source and target corresponding tables.The difference is depicted by the red and green buttons.![]() The
presence of this button against any source table name shows that there is a
structure difference between the corresponding source and the target tables. If
at the same time, the source table name is preceded by a ‘+’plus, then the
presence of this button shows that the table needs to be created in target
database.
The
presence of this button against any source table name shows that there is a
structure difference between the corresponding source and the target tables. If
at the same time, the source table name is preceded by a ‘+’plus, then the
presence of this button shows that the table needs to be created in target
database.
![]() The
presence of this button against any source table name shows that there is a
data difference between the corresponding source and target table. If at the
same time, the source table name is preceded by a ‘+’plus, then the presence of
this button shows that the table needs to be created and populated in target
database.
The
presence of this button against any source table name shows that there is a
data difference between the corresponding source and target table. If at the
same time, the source table name is preceded by a ‘+’plus, then the presence of
this button shows that the table needs to be created and populated in target
database.
![]() After
clicking the red button with S printed on, it turns to grey showing that the structure difference
of that particular table has been selected by the user.
After
clicking the red button with S printed on, it turns to grey showing that the structure difference
of that particular table has been selected by the user.
![]() After
clicking the red button with a D printed on, it turns to grey showing that the data difference of
that particular table has been selected by the user.
After
clicking the red button with a D printed on, it turns to grey showing that the data difference of
that particular table has been selected by the user.
Right Column: “Target Database”
On the right, are listed the target database table names. There are few table names that have “(not present)” appended after their names. This means that these tables are to be created in target database in order to synchronize target database with source database. Some tables’ names have a ‘-’ minus sign preceding them. This shows that these tables are only present in target database and they will remain unchanged in the target database.
While those table names that are not preceded by any sign, or do not have “(not present)” appended after them are already synchronized.
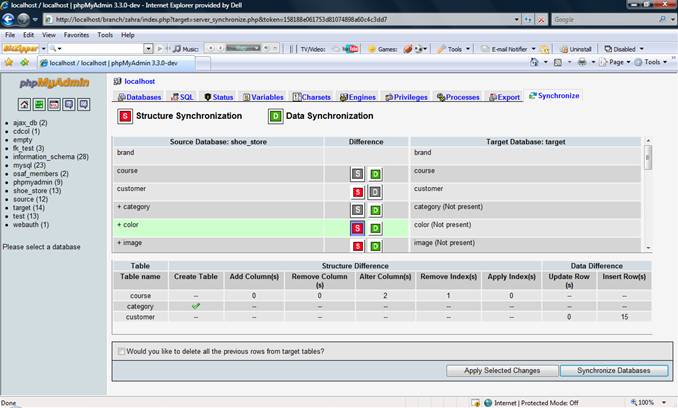
Detailed Difference Table:
The above view shows that for those tables whose structure
or data differences have been selected (depicted by grey buttons ![]() or
or
![]() ),
there exists a description in the second table underneath the table showing
source and target database table names. The description becomes visible only
when a red or green button against any table is pressed.
),
there exists a description in the second table underneath the table showing
source and target database table names. The description becomes visible only
when a red or green button against any table is pressed.
Table:
Displays the Table Name column only to show the name of the table.
Structure Difference:
It elaborates the difference in structure like
Create Table: When the table needs to be created in
the target database, then only a ![]() tick is
seen in the create table column of the description table.
tick is
seen in the create table column of the description table.
Add Column(s): Shows the number of columns to be added.
Remove Column(s): Shows the number of columns to be removed.
Alter Column(s): Shows the number of columns to be altered.
Apply Index(s): Shows the number of indexes to be applied.
Remove Index(s): Shows the number of indexes to be removed.
Data Difference:
It elaborates the difference in data like
Update Row(s): Shows the number of rows to be updated.
Insert Row(s): Shows the number of rows to be inserted.
When the selected buttons (depicted by grey buttons ![]() or
or![]() )
are pressed again, the buttons become deselected (depicted by colored buttons
)
are pressed again, the buttons become deselected (depicted by colored buttons ![]() or
or![]() ) and the
description from the second table regarding those table has been removed.
) and the
description from the second table regarding those table has been removed.
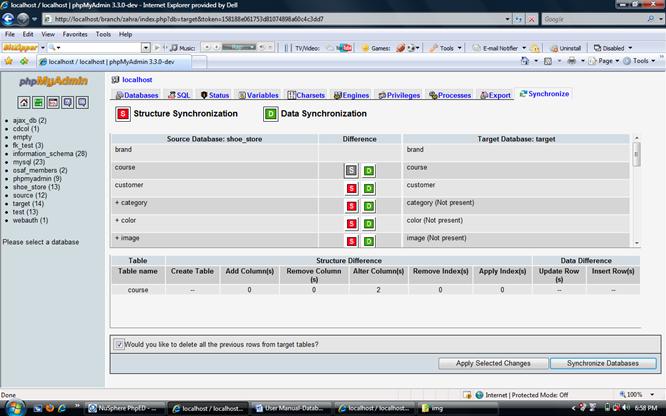
Check Box in Footer:
A checkbox is also visible in the above view. It has a “Would you like to delete all the previous rows from the target tables?”
By checking this check box, the user assures the deletion of any previous rows residing in the target tables that are to be synchronized. This means that before any value gets inserted or updated in the target tables, any previously residing rows will be deleted.
Apply Selected Changes Button in Footer:
The “Apply Selected Changes” button, as it is clear from the name, applies only selected tables’ changes i.e. it allows user to synchronize selective tables between the source and the target databases.
After pressing “Apply Selected Changes” button, the view becomes
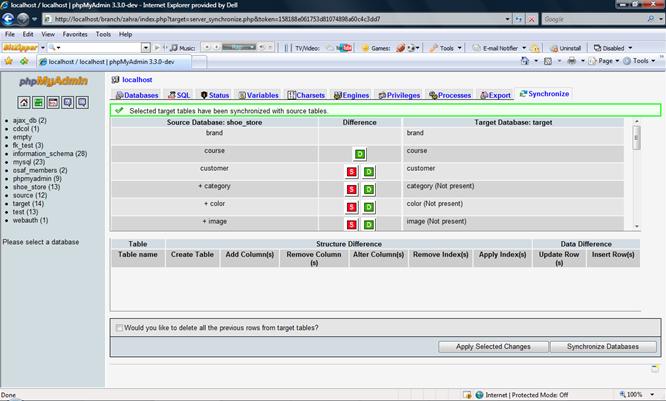
The ”course” table in the above view, now only shows data
difference depicted by![]() . This
shows that the previously selected structure difference in that table has been
applied in target database table “course” because we pressed the “Apply
Selected Changes” button after selection.
. This
shows that the previously selected structure difference in that table has been
applied in target database table “course” because we pressed the “Apply
Selected Changes” button after selection.
“Apply Selected Changes” button allows the user to synchronize tables’ data and structure according to his/her requirement or desire.
Whenever “Apply Selected Changes” button is pressed and the page is reloaded, the checkbox becomes unchecked. This means that the user gets a choice to delete the previous rows of a certain set of tables and not from all the tables.
Synchronize databases button in Footer:
“Synchronize databases” button in the footer completely synchronizes the target database with the source database irrespective of which tables are selected for which type of synchronization.
“Synchronize databases” button if pressed after “Apply Selected Changes” button has been pressed once or twice or several times, will apply all the remaining changes that have not been selected earlier.
The view after “Synchronize databases” button has been pressed look like this:
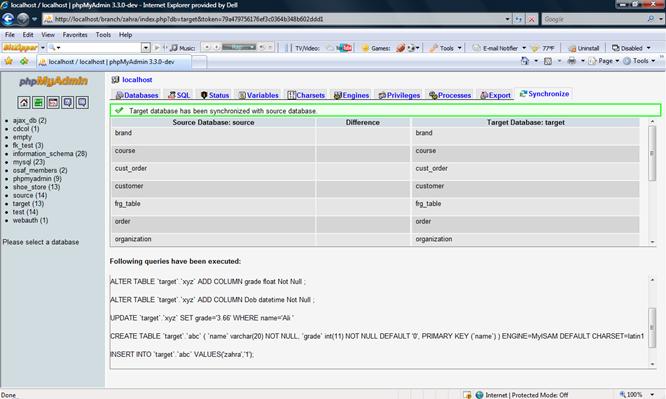
The lower half of the page displays the list of queries that have been executed in order to synchronize the databases while the upper half displays the source and target database table names.